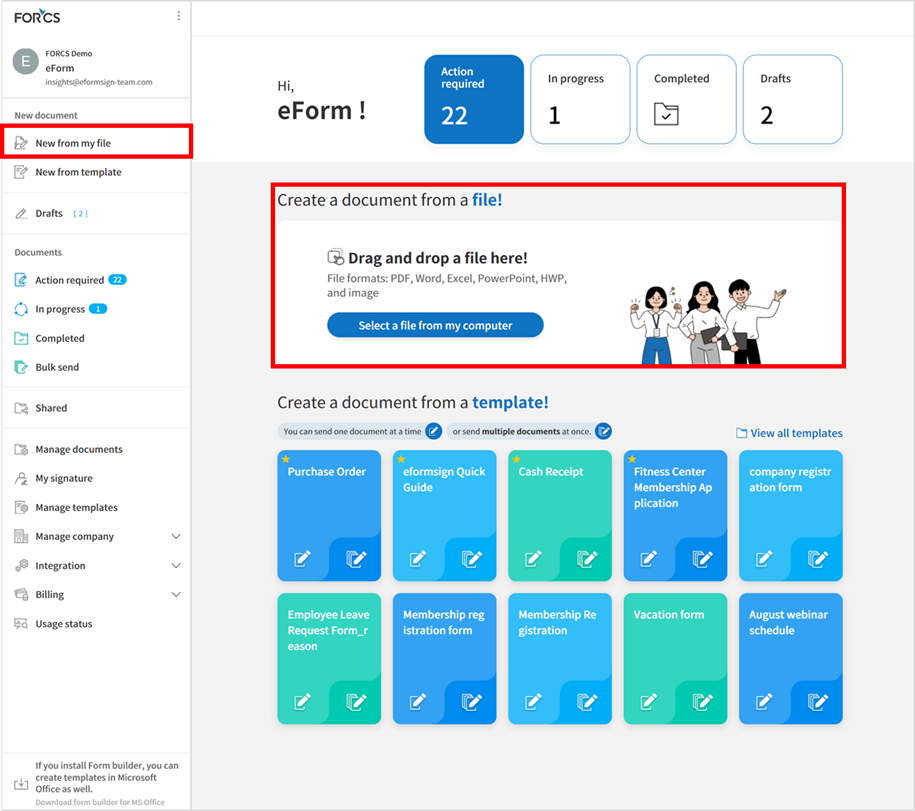
Anyone can use eformsign to easily convert existing documents into electronic documents and then send them for signature. In eformsign, there are two ways to create and send documents. You can upload a file from your PC to eformsign, or use an existing template saved in eformsign.
New from my file: You can upload your file to create an electronic document and then send it to signers.
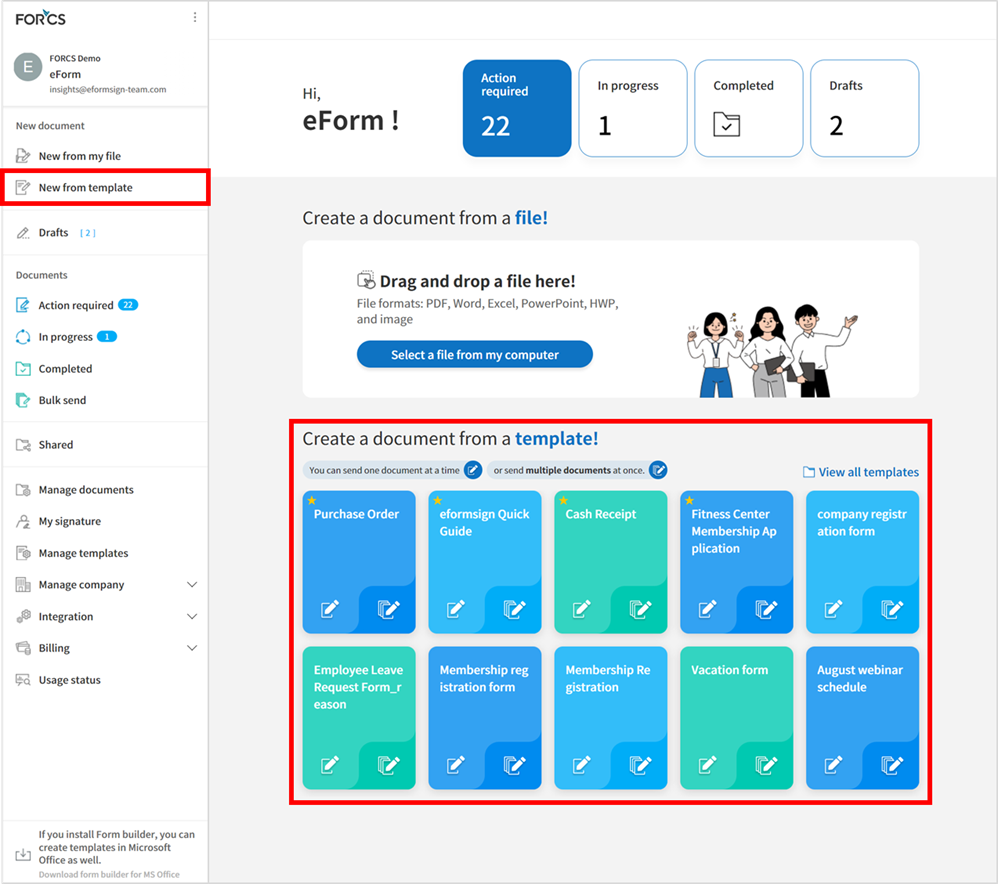
New from template: You can use a template uploaded to eformsign to create documents. When you click this menu, templates created by the company administrator or members with template management permissions are displayed on the screen.
Note
Templates can be created only by the company administrator or members with the template management permission, and the templates on the screen are shown only to members who are given template usage permission for a given template.
When creating a document with New from my file, you cannot save it as a template. For documents you plan on using frequently, it is recommended to create a template first.
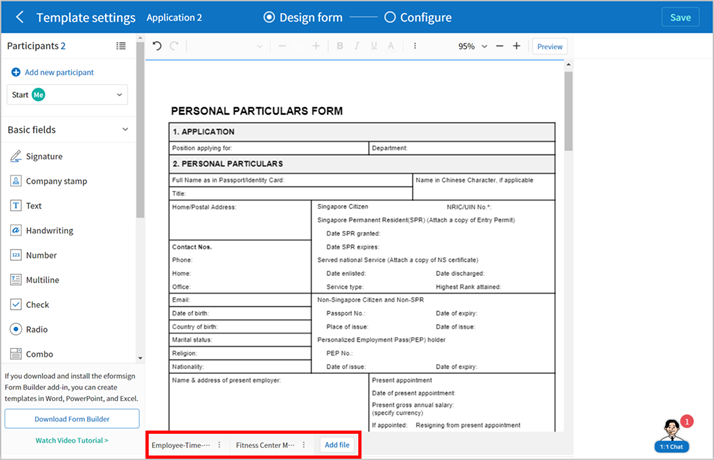
You can upload a file you want and then add fields onto the document. Then, you can specify the signers that will fill in each field and enter the information of the document signers and reviewers, and then send the document.
Go to the New from my file menu.
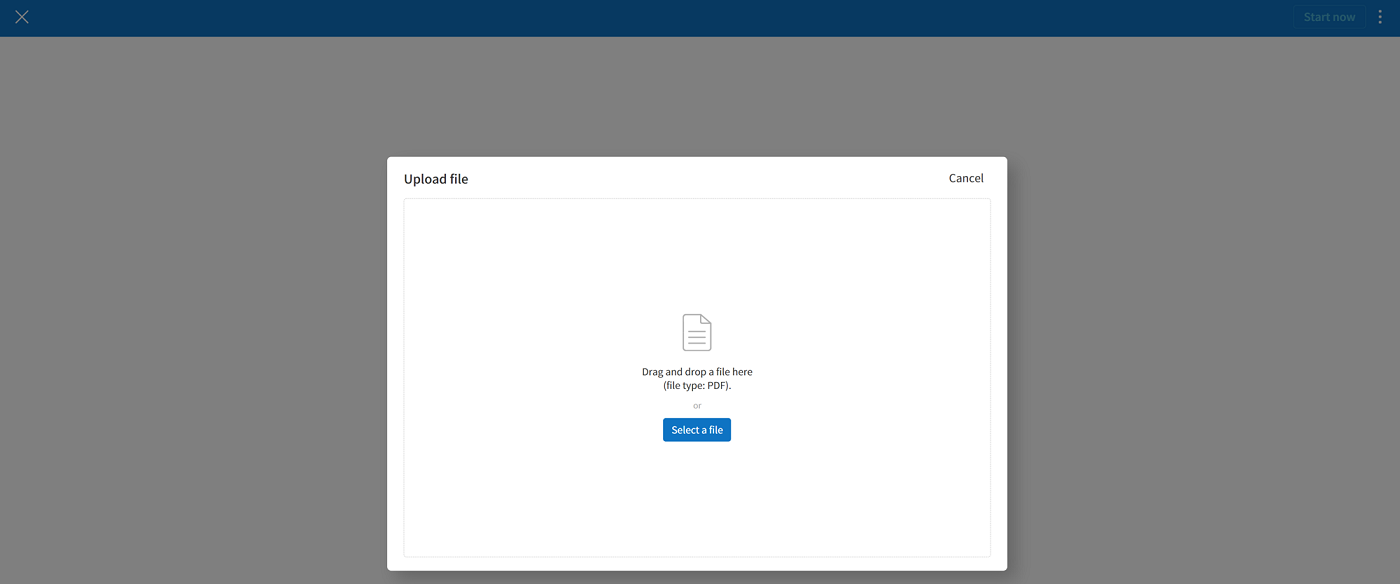
Upload the document file you want. The supported file types are pdf, hwp, doc, docx, xls, xlsx, ppt, pptx, odt, jpg, png, gif, and tiff with a maximum size of 9MB.
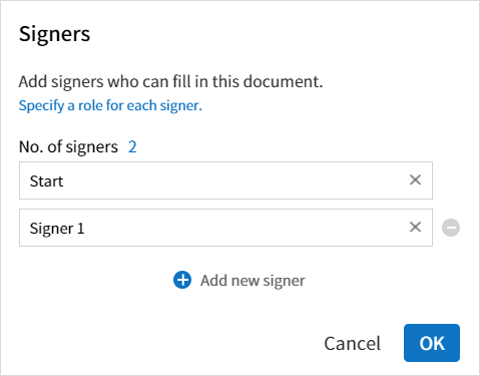
Add the document signers that will be participating in document creation and select their roles.
Note
You can add signers by clicking Add new signer and up to 30 can be added. Note that you can change, add, or delete signer information in the Add recipient step after the Design form step.
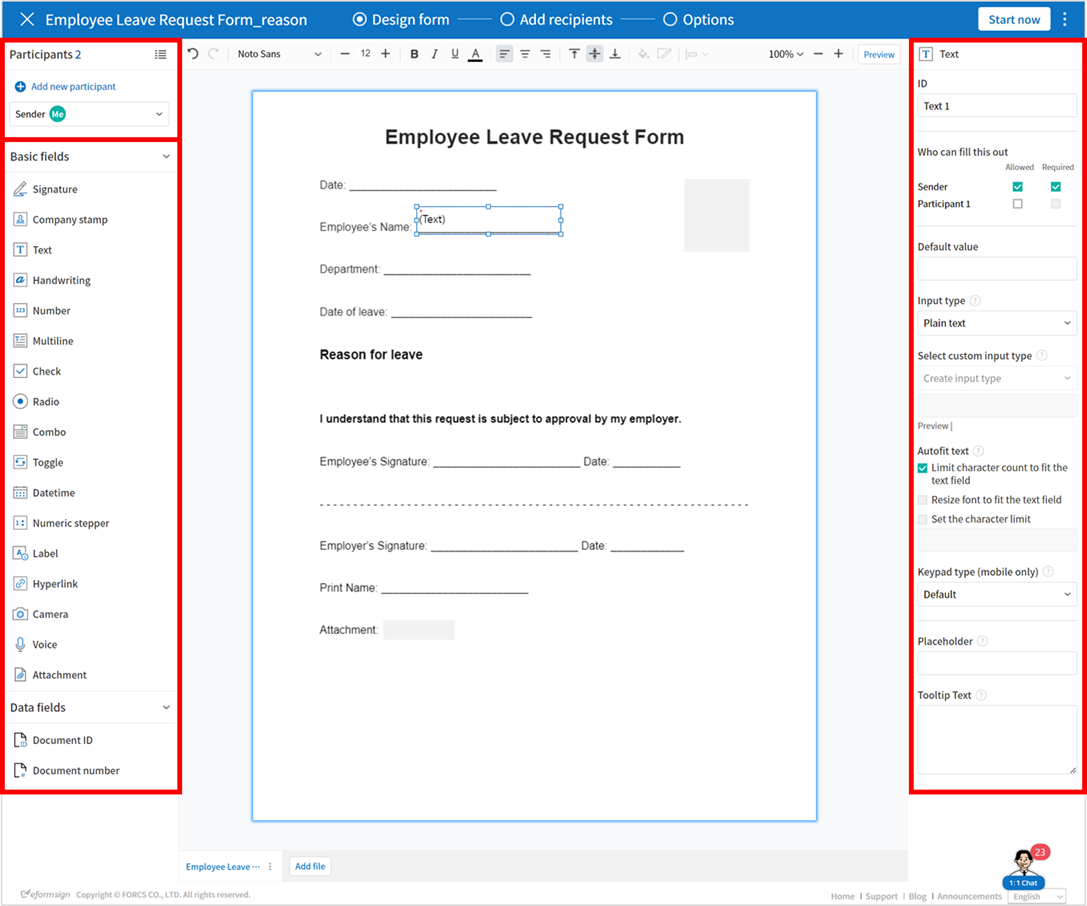
Add the fields each signer will fill in and then set the field properties on the right.
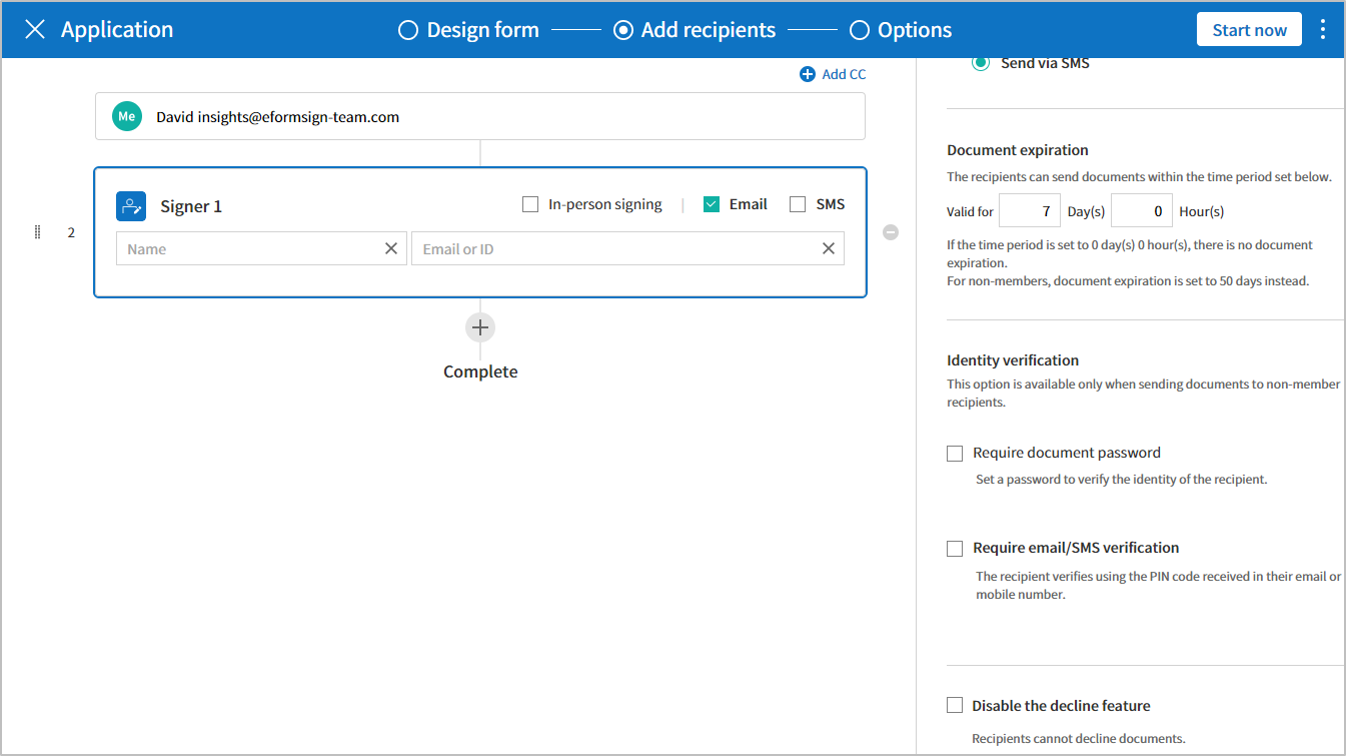
In the Add recipients step, you can add contact information such as email and phone number and set Recipient options for each signer.
Note
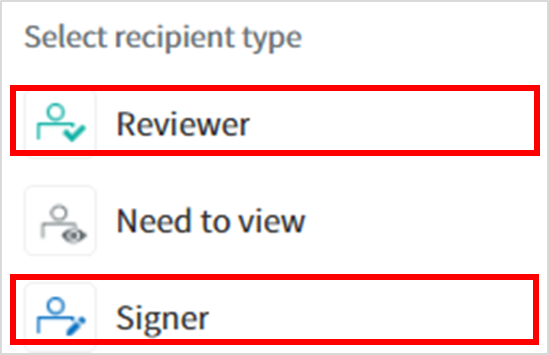
‘Signer and Reviewer’ recipients
There are 2 main recipient types: reviewer and signer. The
signers added in the Design form step are shown in the Add
recipients step. You can enter the contact information of each
recipient such as email. In the Add recipient screen, you can
delete/add signers and reviewers and set detailed options for
each recipient.
Tip
The difference between signers and reviewers
Signers can fill in fields such as signature and text on
each document, but reviewers cannot fill in fields and can
only approve documents after reviewing them.
Note
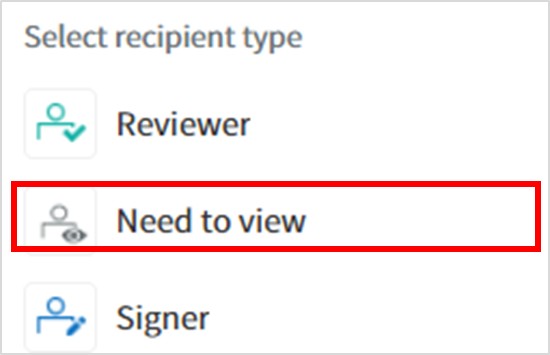
‘Need to view’ recipient
In addition to reviewer and signer, there is also another recipient type called ‘Need to view’.
You can select ‘Need to view’ when selecting recipients in the workflow. A recipient who is assigned as ‘Need to view’ can’ send a document to the next step in the workflow by only viewing the document.
❗Note that a recipient assigned the Need to view type cannot fill out a document, and cannot approve/reject a document.
Tip
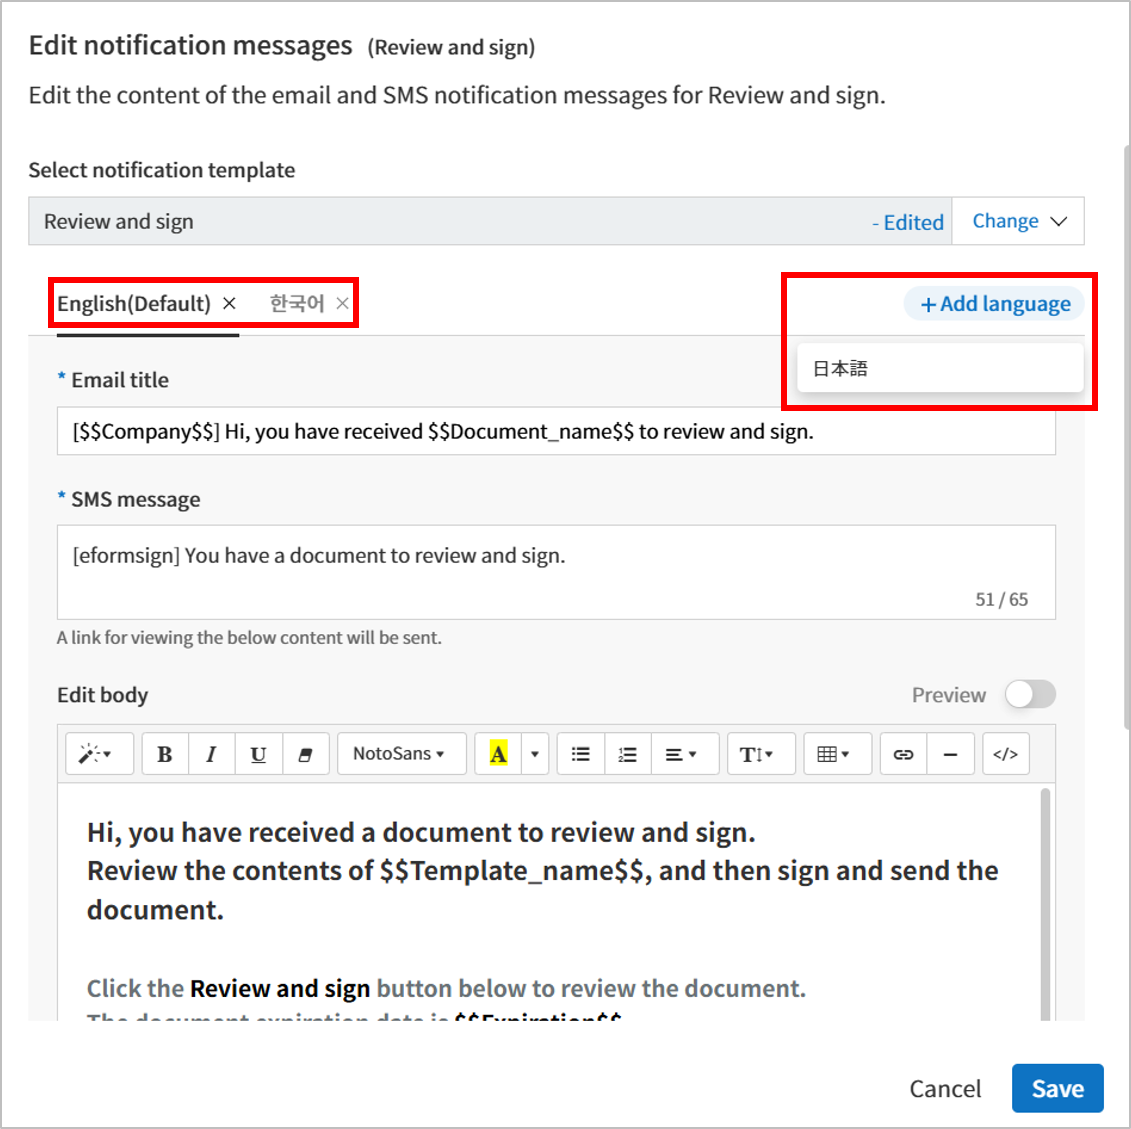
💡 How to select a notification language for each recipient step when using New from my file
Navigate to the ‘New from my file’ page.
Upload a file and navigate to the ‘Add recipients’ step.
Select a workflow step you want and then click the language symbol on the right.
Select the language you want.
Click the ‘Edit message’ button on the right under ‘Recipient options > Notification’.
In the ‘Edit notification message’ pop-up displayed, view and edit the content in the selected language.
Tip
Merge workflow steps - Parallel signing
You can merge multiple workflow steps into o/e so that documents can be sent to all recipients at the same time, regardless of the signing order. You can also split workflow steps that are merged together.
Instructions:
Click the workflow step you want to merge with (when merging two steps, you must click the bottom one).
Click the Merge signing order icon displayed at the top left corner of the selected workflow step. The bottom and top workflow steps will be merged together.
You can also split workflow steps by clicking the same icon.
Click the Options step to change the document title and select whether to timestamp the document when completed.
Note
The above three steps are the steps you need to go through before
creating a document. If you save the document before
clicking the Start now button, the document is saved in
My saved files, and the saved file can be opened again so
that you can begin creating a document. To save a document, click the Save button at the top right corner of the screen.
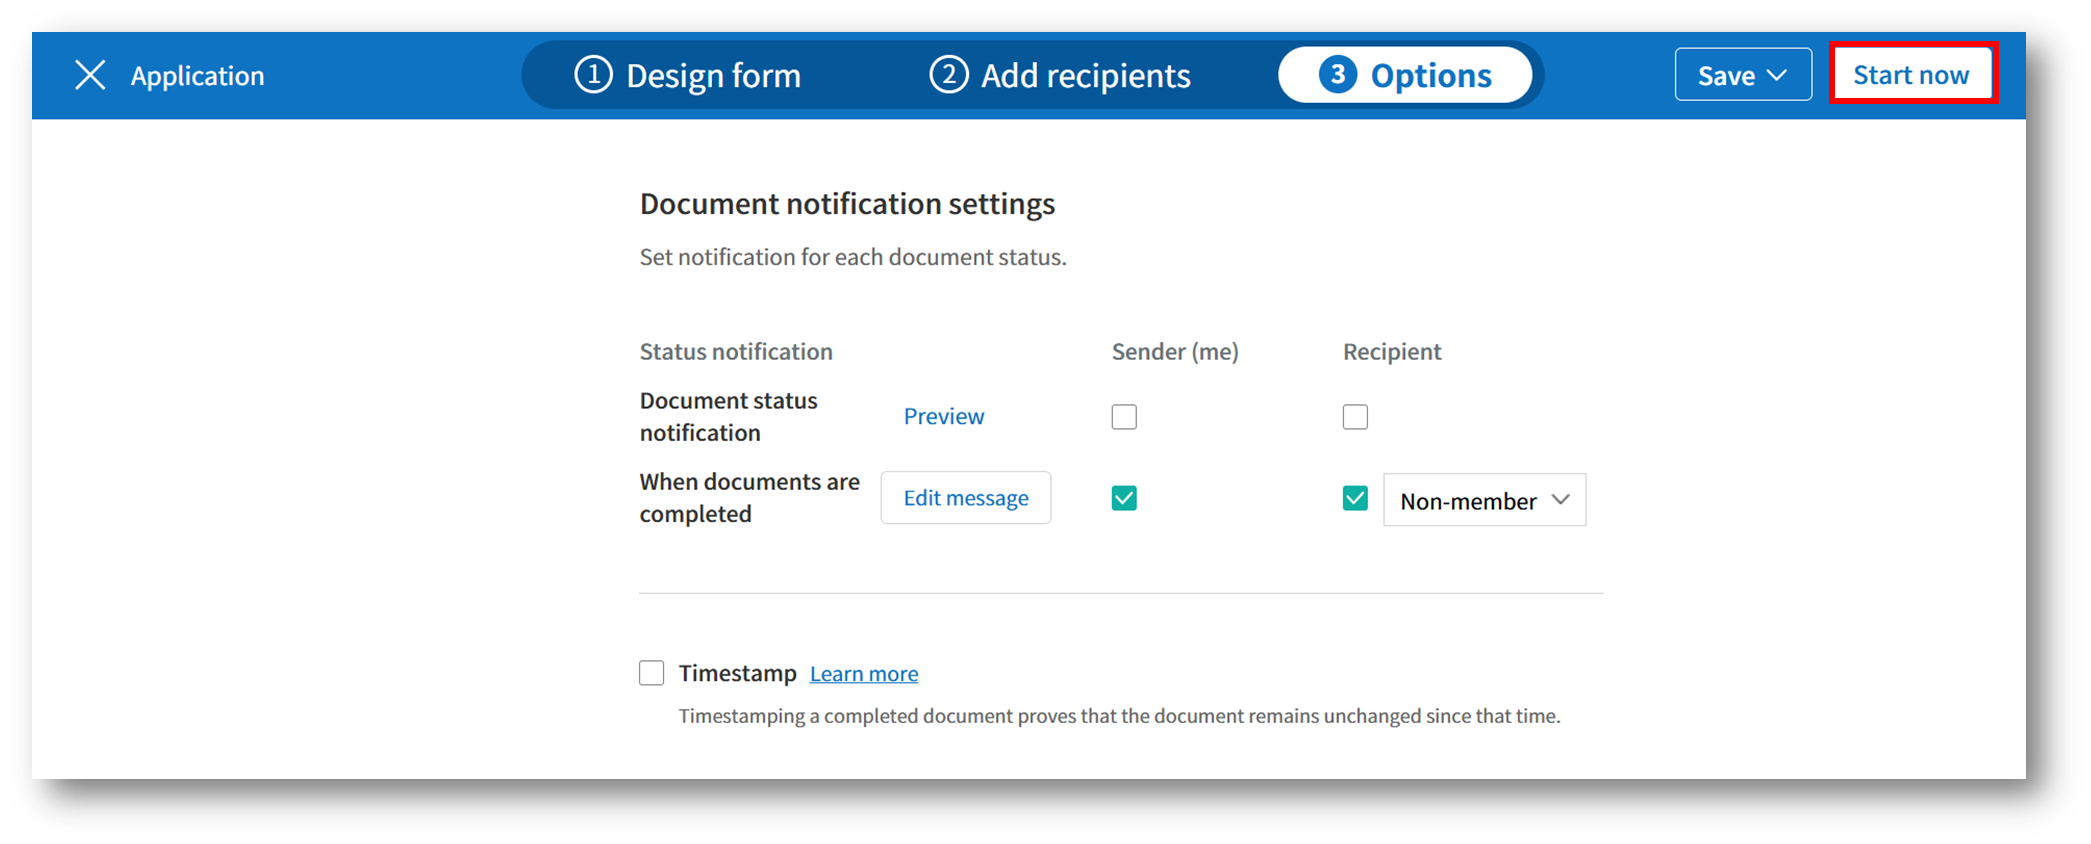
When you are done with all the settings, click Start now.
Caution
A document is created once you click Start now, and it counts
as a created document.
If you click the Send button after reviewing/filling in the document, then the document is sent to recipients.
In the Design form step or the Add recipients step, you can add signers who will receive the document.
In the Add recipients step, you can set detailed settings for each signer. Additionally, you can add or remove signers as well as adding reviewers who will review the document.
You have to add the name of each signer and reviewer, and their email/ID. If a signer is a member of your company, you can select the member in the drop-down menu and import their member information stored in eformsign.
The detail settings in Recipient options is displayed differently depending on whether the signer or reviewer is a member of your company or is a non-member.
Note
In addition to signers and reviewers, you can also add CCs. CCed recipients can monitor the document progress and will receive a notification email when the document is sent and completed. Only members can be set as CCs.
Note
In order for a recipient to be recognized as a member, the name and email/ID must match.
When the recipient is a member:
Select document delivery method: You can select whether to send the document via email or mobile. The email address and mobile number are automatically filled-in if a member is selected.
Note
When the mobile number option is selected, then the document will be sent via SMS and additional charges will occur.
Notification:Edit notification message Allows to edit the email or SMS notification message sent to recipients.
Document expiration: Allows to set the period in which recipients can open and submit documents.
Tip
Setting the valid period to 0 days 0 hours disables the document expiration period.
Disable the decline feature: Allows to block recipients from declining documents. If you select this option, the Decline feature will not appear on the recipients’ screen.
Tip
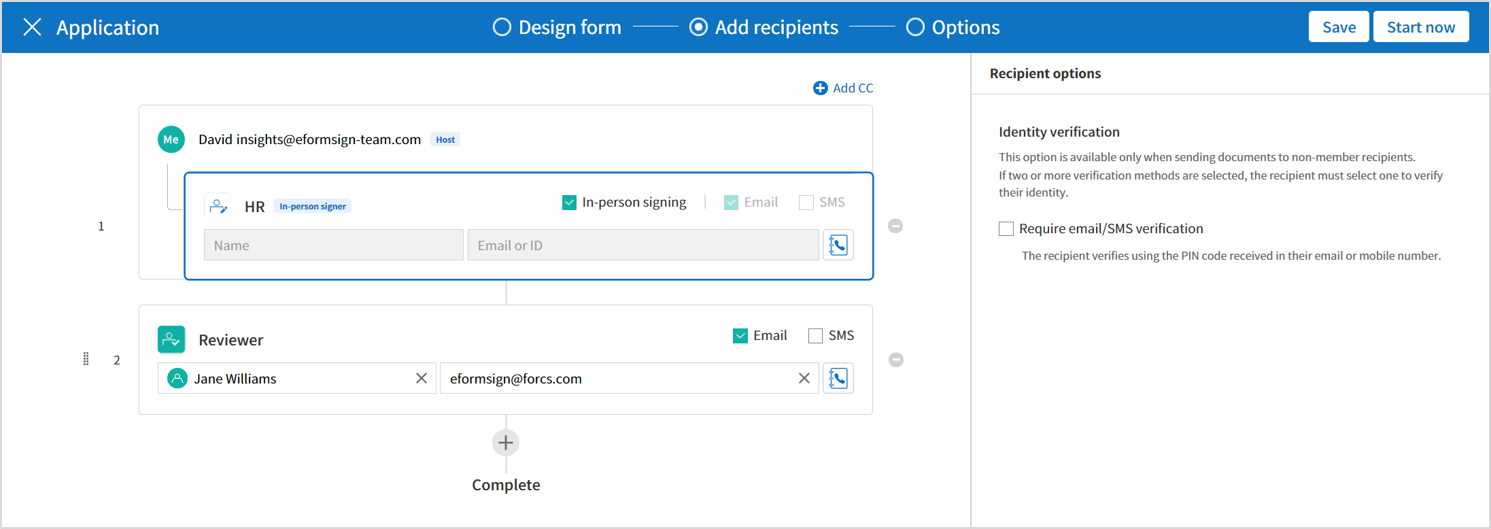
💡 Using the In-person signing feature
The In-person signing feature allows you to collect signatures in person from signers using a single device, whether it’s a PC, tablet, or smartphone. By using this feature, even when you collect signatures from signers in person, the signers’ information is recorded in document history and audit trail certificate, and completed documents are automatically sent to the signers.
To get started, select In-person signing in the recipient step where you want to use the feature.
This recipient of this step becomes the In-person signer and the recipient of the step before it becomes Host. You can configure the settings so that an In-person signer needs to verify their identity before opening the document.
Host: The Host can start and complete In-person signing sessions. If the Host is a signer recipient, then the Host can sign as well. Note that only members can be in-person signers and Need to view recipients cannot be the Host.
In-person signer: In-person signers can sign and only signer recipients can be in-person signers.
✅ For instructions on how to use the In-person signing feature, refer to the following blog.
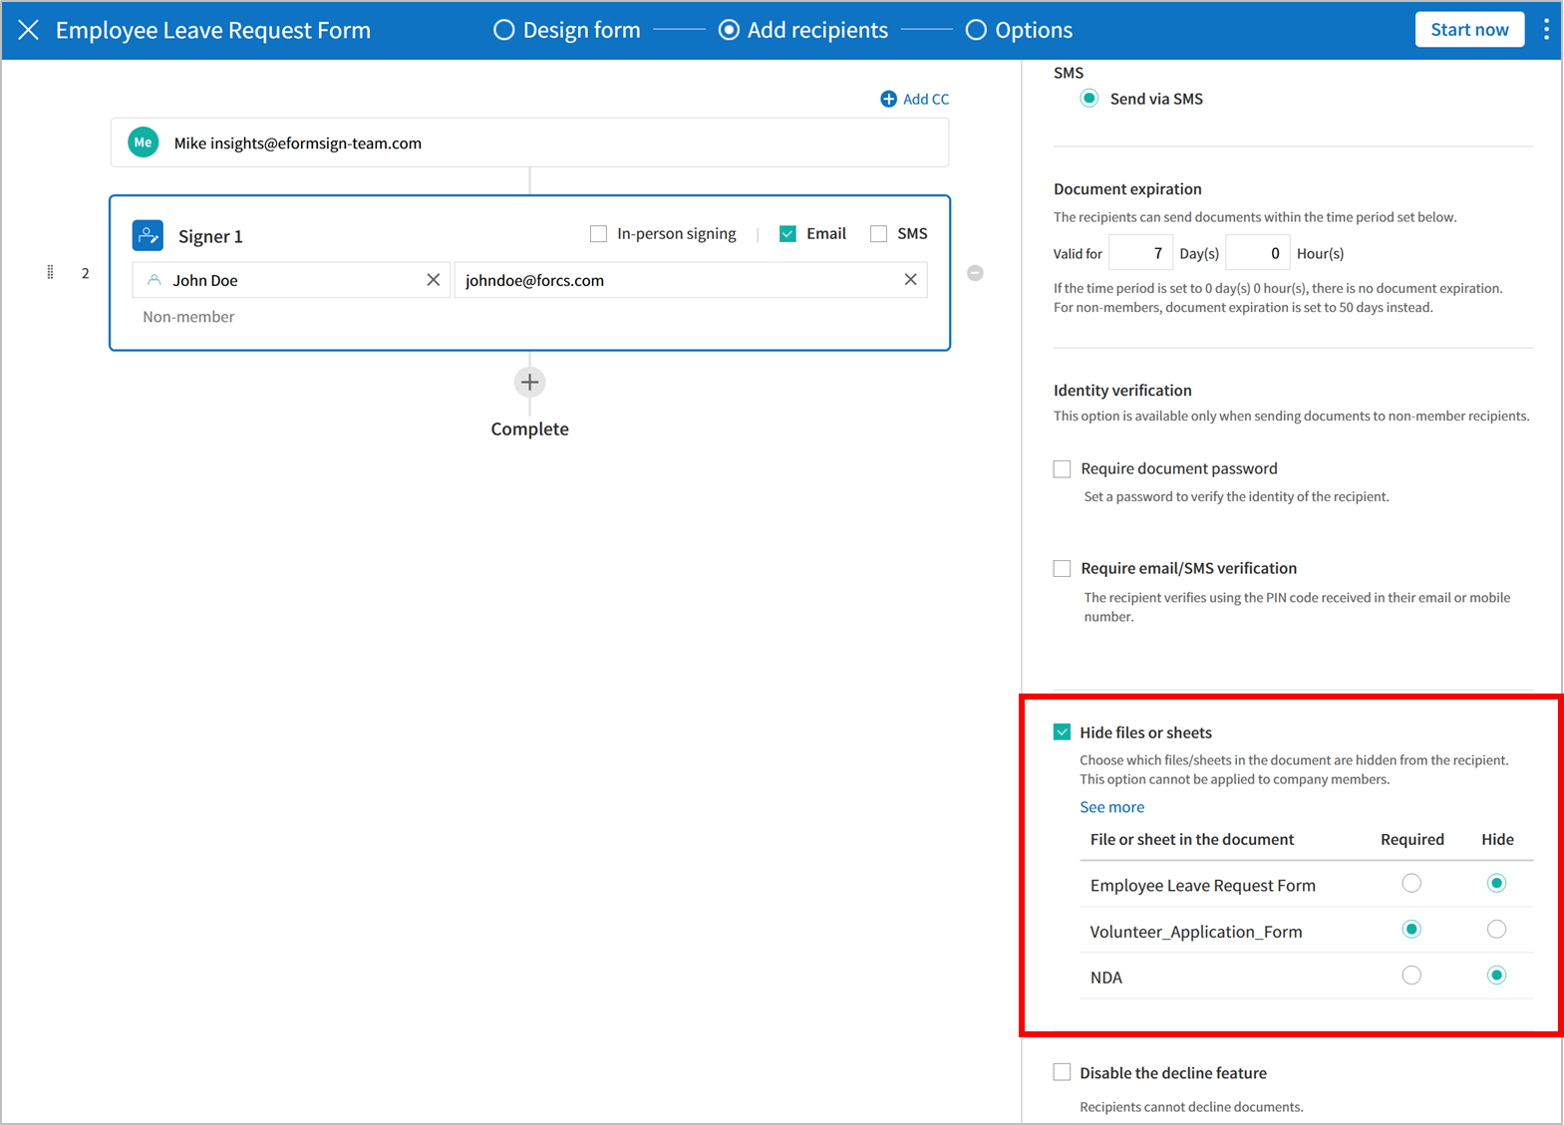
When the recipient is a non-member:
If the information you enter is not the same as the member information, then the recipient is recognized as a non-member. This requires the below information to be filled in.
Notification > Email/SMS: You can select one of Email and SMS, or both. If you select SMS, then you must enter the mobile phone number of the recipient.
Caution
If you select SMS, then the document is sent via SMS and additional charges will apply per SMS.
Notification: You can edit the outgoing email or SMS notification message when documents are sent by clicking the Edit notification message button.
Document expiration: You can set the expiration period in which the non-member can open and submit the document. The document cannot be opened once the date expires.For non-members, the document expiration can be set up to 50 days.
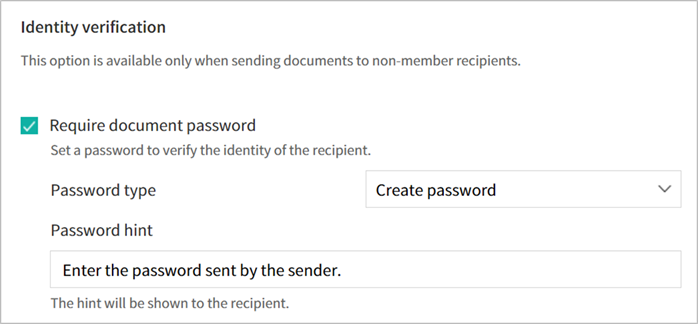
Identity verification: You can make recipients to verify their identity before opening documents. You can set a two-step verification by selecting both Require document password and Require email/SMS verification.
Require document password : Allows to set a password that requires non-member recipients to enter before opening documents. You can also enter a password hint for the recipient.
There are three types of passwords you can set: Create password, Recipient name, Field value.
Create password: The recipient must enter the password you set here in order to open the document.
Recipient name: The recipient must enter the name that the sender entered in the Send document pop-up window in order to open the document.
Field value: You can select a field and the value entered in that field becomes the password.
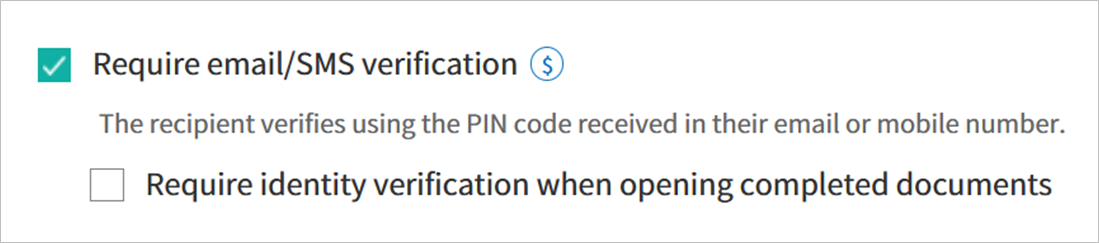
Require email/SMS verification: The recipient must enter the 6 digit PIN code sent to their email address or phone number to opent the document. Choosing this option along with the Require document password option will make it a two-step identity verification.
Require identity verification when opening completed documents: Checking this option requires the recipient to also verify their identity when opening the completed document.
Note
Additional charges will be applied if the 6 digit PIN code is sent via SMS.
Disable the decline feature: Blocks recipients from being able to decline documents.
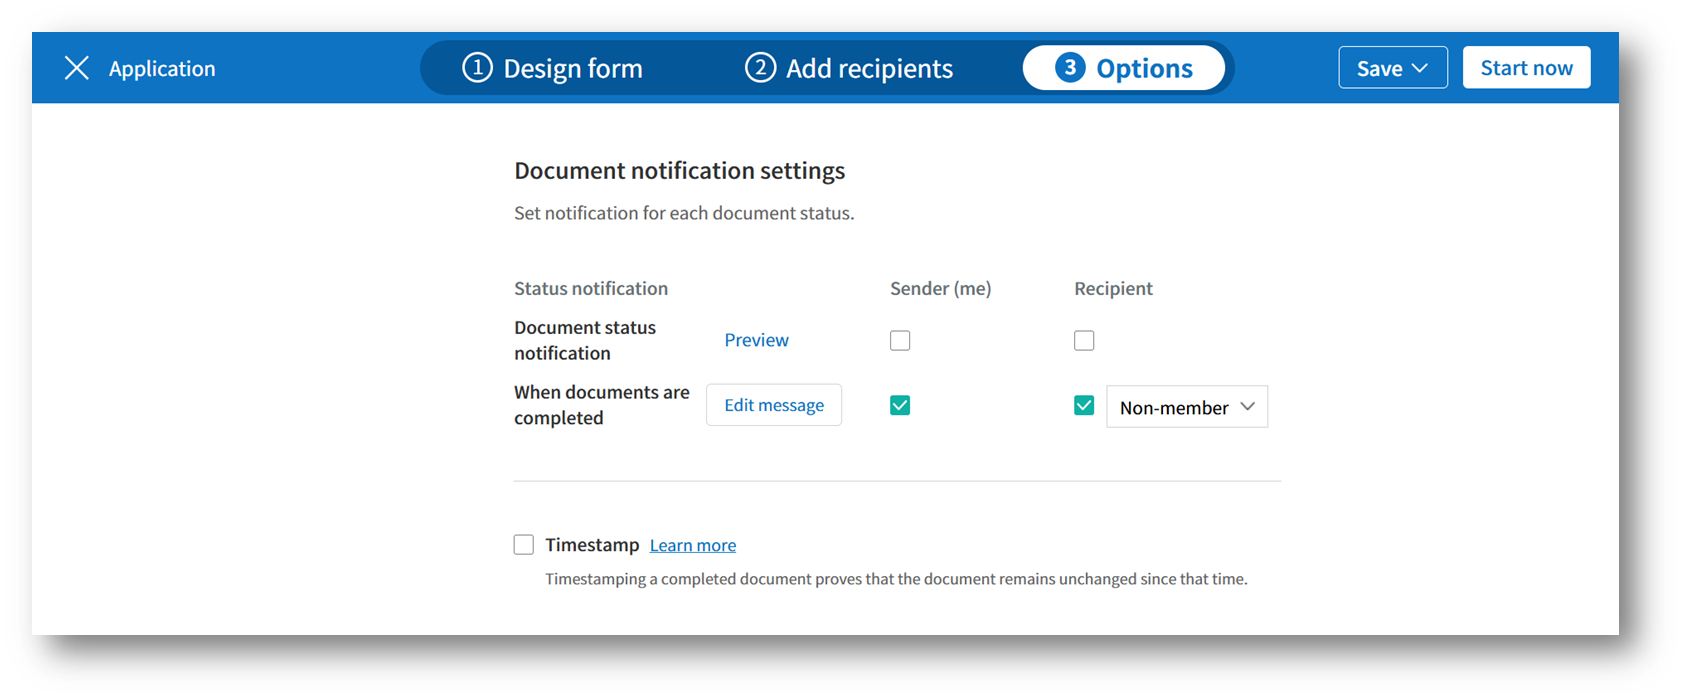
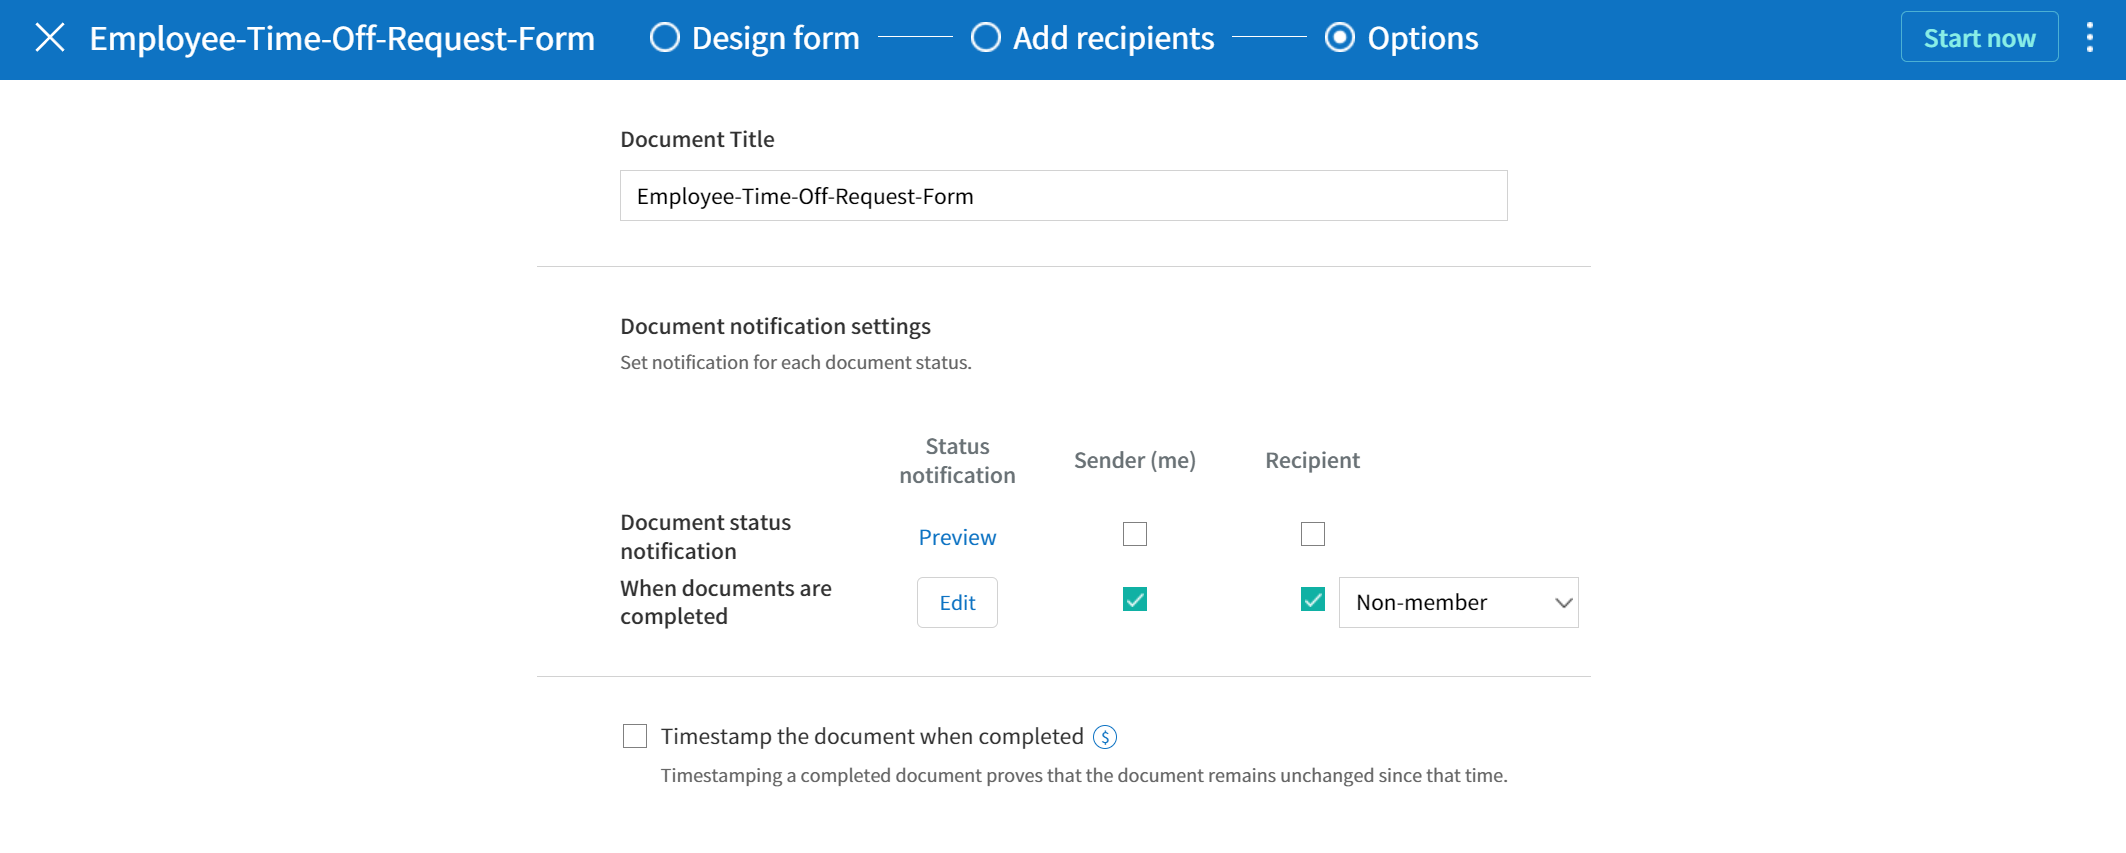
In the Options step, you can set and edit document notification settings, and choose whether to timestamp the document.
Document notification settings: Sets notifications about the document’s status and completion to be sent to recipients, and previews or edits notification messages.
When documents are completed
Select notification template: The document status notification template is set to the default template, but you can change it to another template if you create one. For information on how to create a new notification template, refer to Notification template management.
Email title: Sets the title of the email sent when a document is completed.
SMS message: Sets the message when a document completion notification is sent via SMS. A link for viewing the document is sent together with the message.
Note
The length of the message can be set up to 65 characters.
Edit body: Edits the content of the notification message.
Files attached & Method: Select the files to be send together with the document completion notification and select the filees to be attached.
Download link: A download link button is included in the email or SMS of a completed document, and opens a document viewer page when clicked. In the viewer page, you can view and download the document.
Attachment: PDF file(s) are included in the email. However, if the size of the document exceeds 10 MB or file(s) are sent via SMS, then a download link is included instead.
Caution
If you send an email notification using the Attachment method, the completed document is included in the email. Therefore, even if is configured to require the recipient to go through identity verification, the recipient can still view and download the document..
Timestamp: Applies a timestamp to the completed document.
Note
❗Applying a timestamp incurs an additional charge of 0.5 USD.
Note
❗You can change the document name once you click the Start now button to fill out the document.
Note
❗Clicking the Save button before you click the Start now button allows you to save the document to the My saved files inbox.
You can create and send documents whenever necessary by uploading
frequently used forms and saving them as templates by adding workflows
and other details.
A template is shown in the Manage templates page only to
member/groups that have been granted template usage permission for
that template.
Click and go to New from template in the dashboard or the sidebar menu.
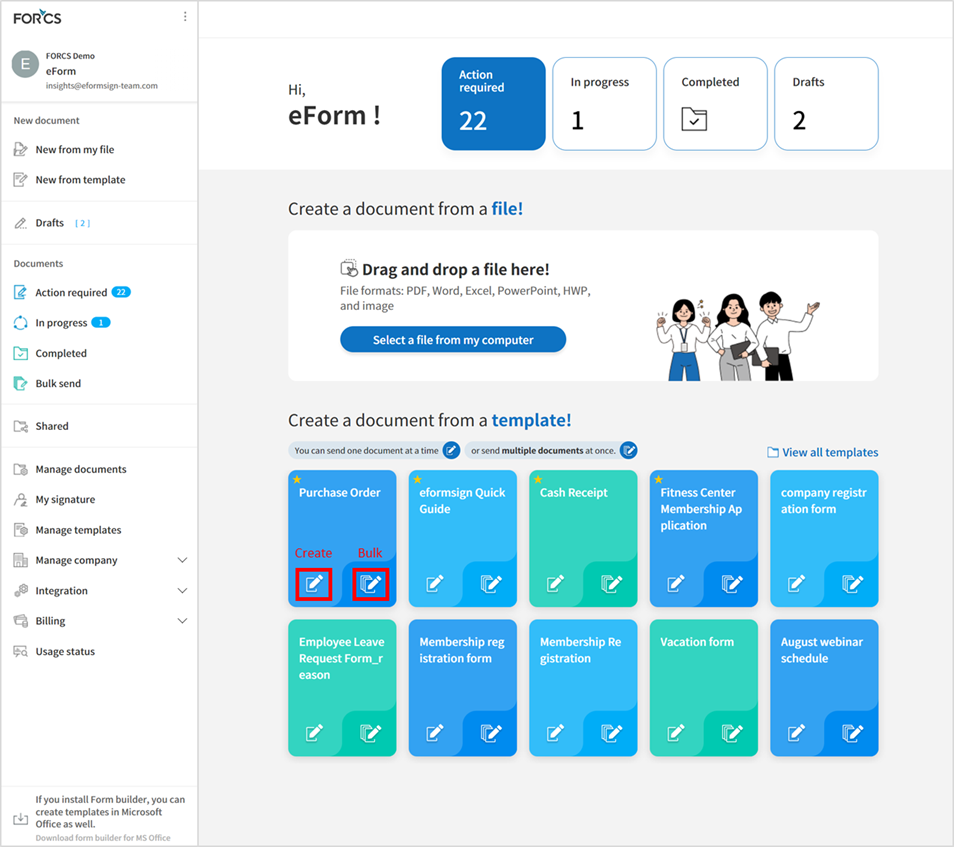
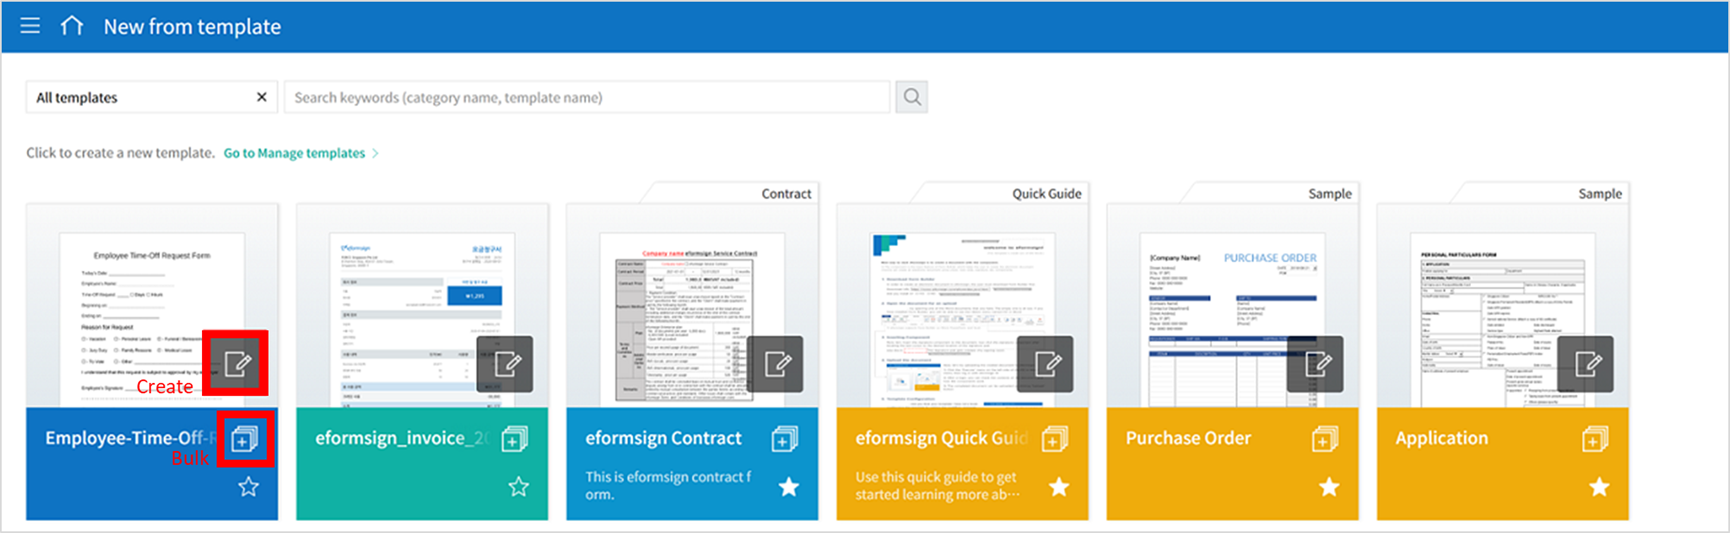
From the dashboard you can click the Create icon of the template you want to create a document from to create a document. As well, you can click the Bulk icon to create multiple documents from the template.
You can also click New from template and then click the Create icon of the template you want to create a document from in the New from template page. As well, you can click the Bulk icon to create multiple documents from the template.
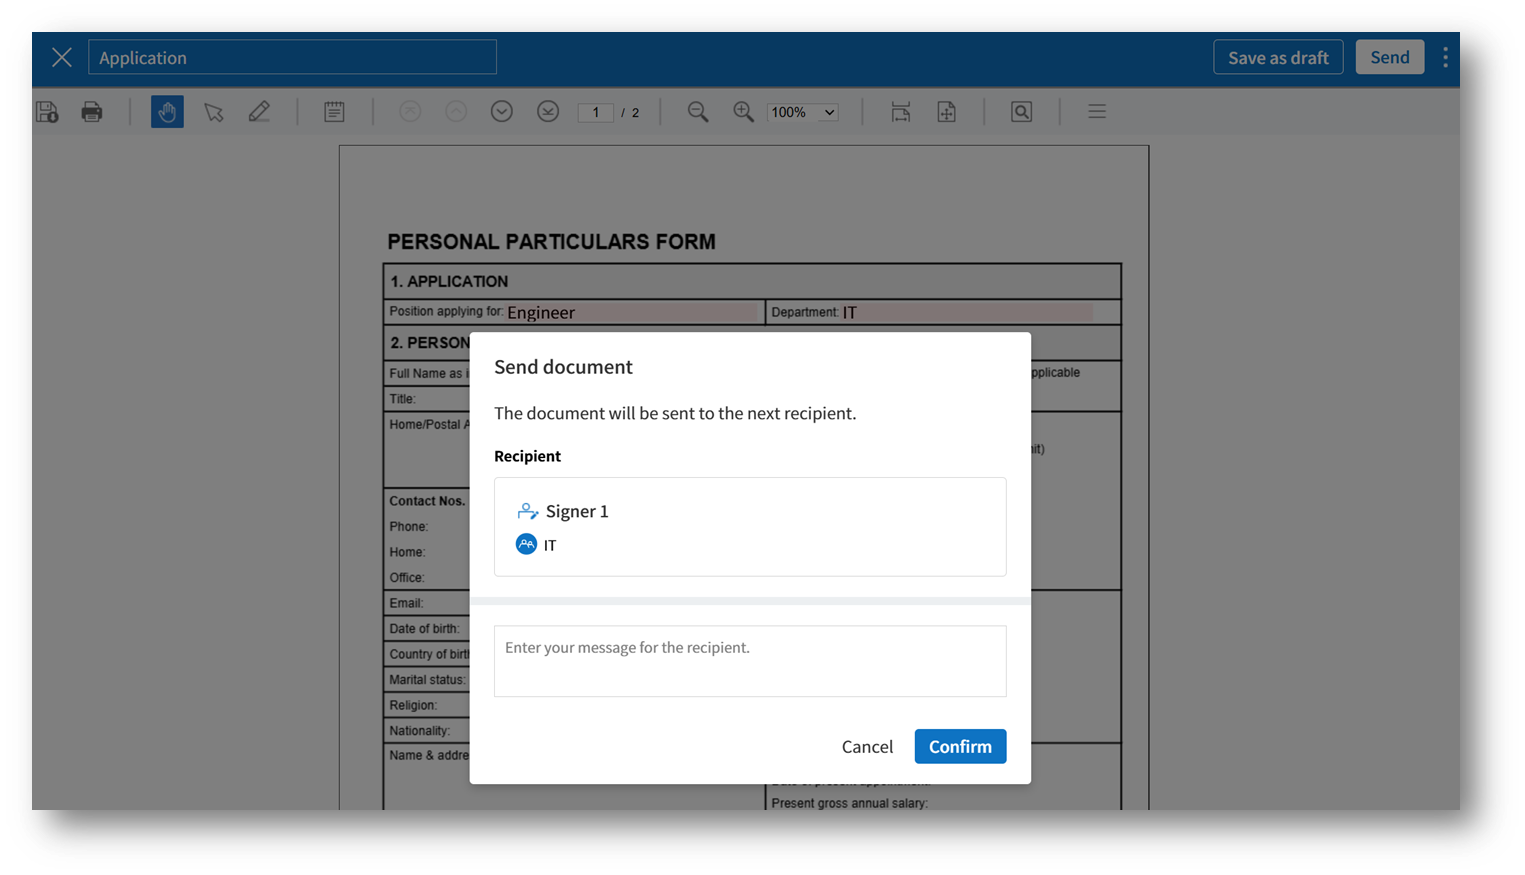
If you create a document and then click the Send button on the top right corner, then the Send document pop-up window will be displayed.
Note
The button may be displayed as Send or Complete,
depending on the workflow set for the template.
Important
Documents saved when clicking the Save as draft when creating
documents from templates can be found in the Action required page, not the My saved files page.
To continue to create a document saved as a draft, click the Edit button in the Action required page.
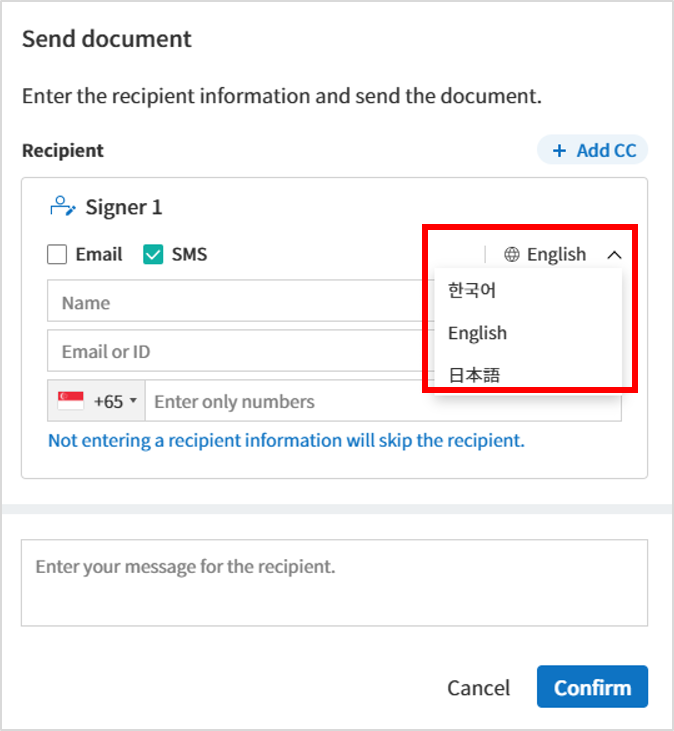
In the Send document pop-up displayed, select either one of Email or SMS as the delivery method for sending the document. You can also select both.
Fill in the recipient’s name and contact information. If you want to change the language, then click the language button.
Click the Confirm button to send the document.
Tip
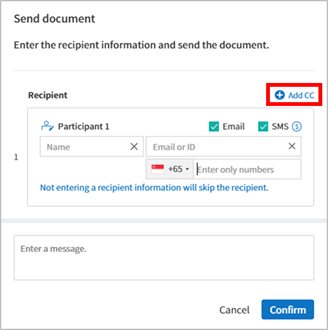
Adding CC recipients
To add CC recipients to the document, click the Add CC button and then select the members or groups you want to add in the pop-up displayed.
CC’ed recipients can monitor the progress of the document, and are notified when the document is sent/completed.
❗Note that only groups and members can be CC’ed and non-members cannot be CC’ed.
Tip
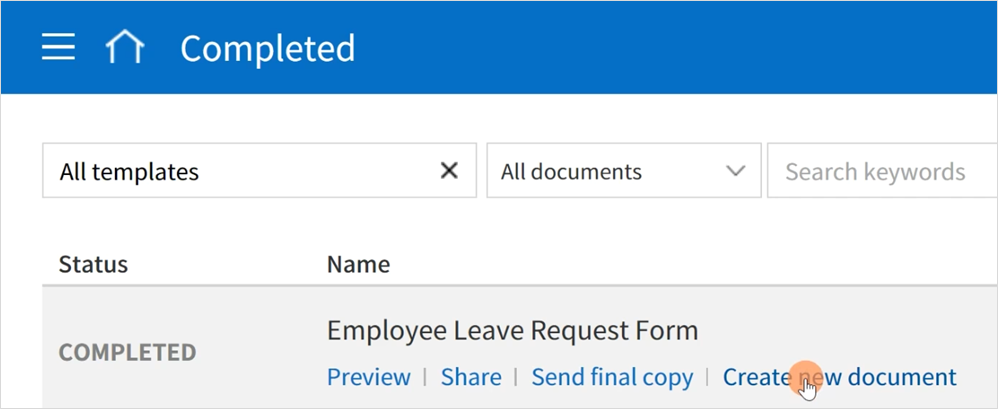
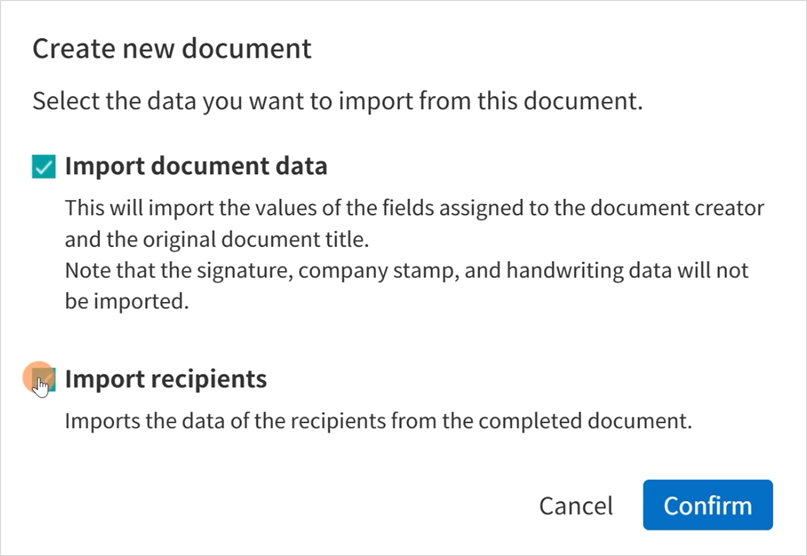
Creating new documents from existing documents
You can quickly create new documents from existing ones by importing field data and/or recipient information (e.g. name, email, etc.) of existing documents.
Instructions
Go to a document inbox and click on the Create new document button under the completed document of your choice.
In the Create new document options pop-up displayed, choose whether to import document data, important recipient data, or both.
Depending on what you choose, you will see that the field data and/or recipient data are automatically filled out, allowing you to quickly create and send documents.
❗ Note that you can create new documents from existing ones using New from template. This feature is planned to be applied to New from my file in the near future.
When creating a document from a template, you can use the Send in bulk feature to send a document to multiple recipients at once.
Note
This feature requires either the company administrator or template usage permission.
Send in bulk
Go to New document > New from template.
2. Click the Send in bulk icon of the template you want to create a
document from.
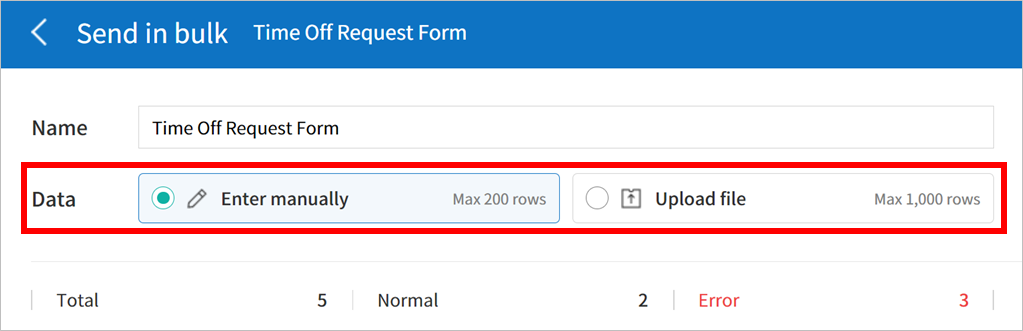
Select whether to enter data either by manually (Enter manually) or by uploading an Excel file (Upload file).
Tip
How to enter data when sending documents in bulk
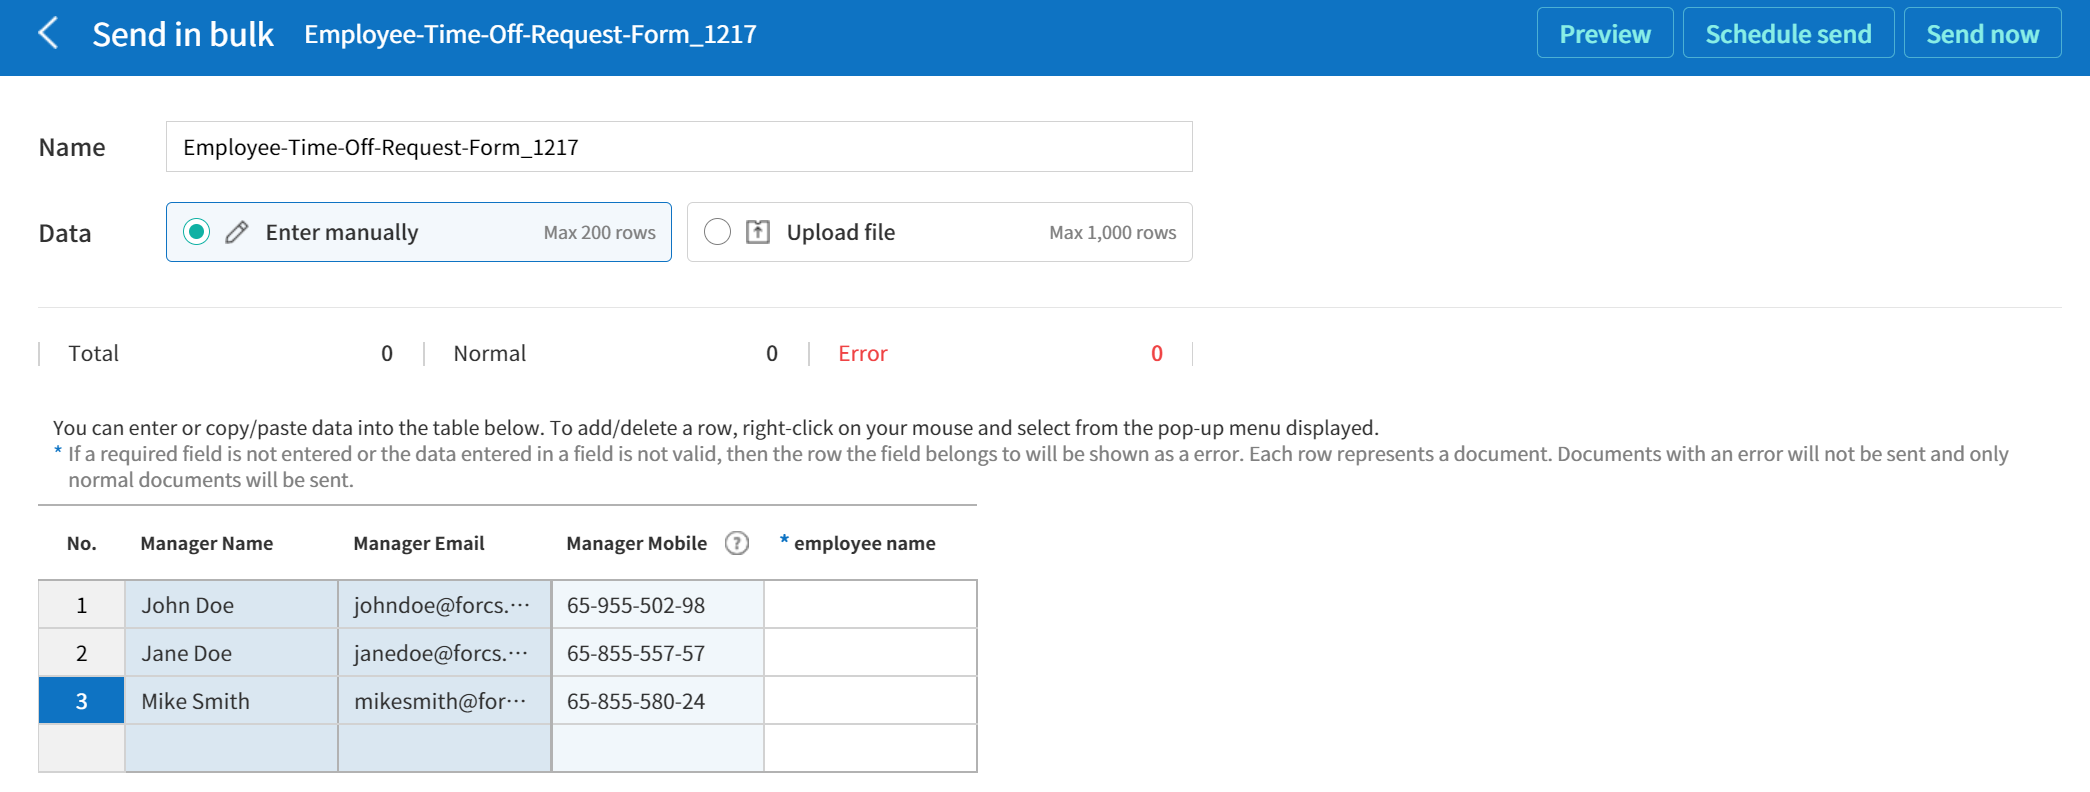
Method 1. Enter manually: max 200 documents (rows)
Select Enter manually to display the table in which you can enter data directly. Each column of the table contains all the fields of a document. The IDs of fields (which are fields in a template) are shown as the name of each column. The last row of the first column (No.) indicates the number of documents to be created..
Tables are filled in a similar way as in Excel. You can double-click on each cell to enter a value and right-click on the mouse to add or delete columns. The value entered in a cell can be copied and pasted, and dragged to another cell.
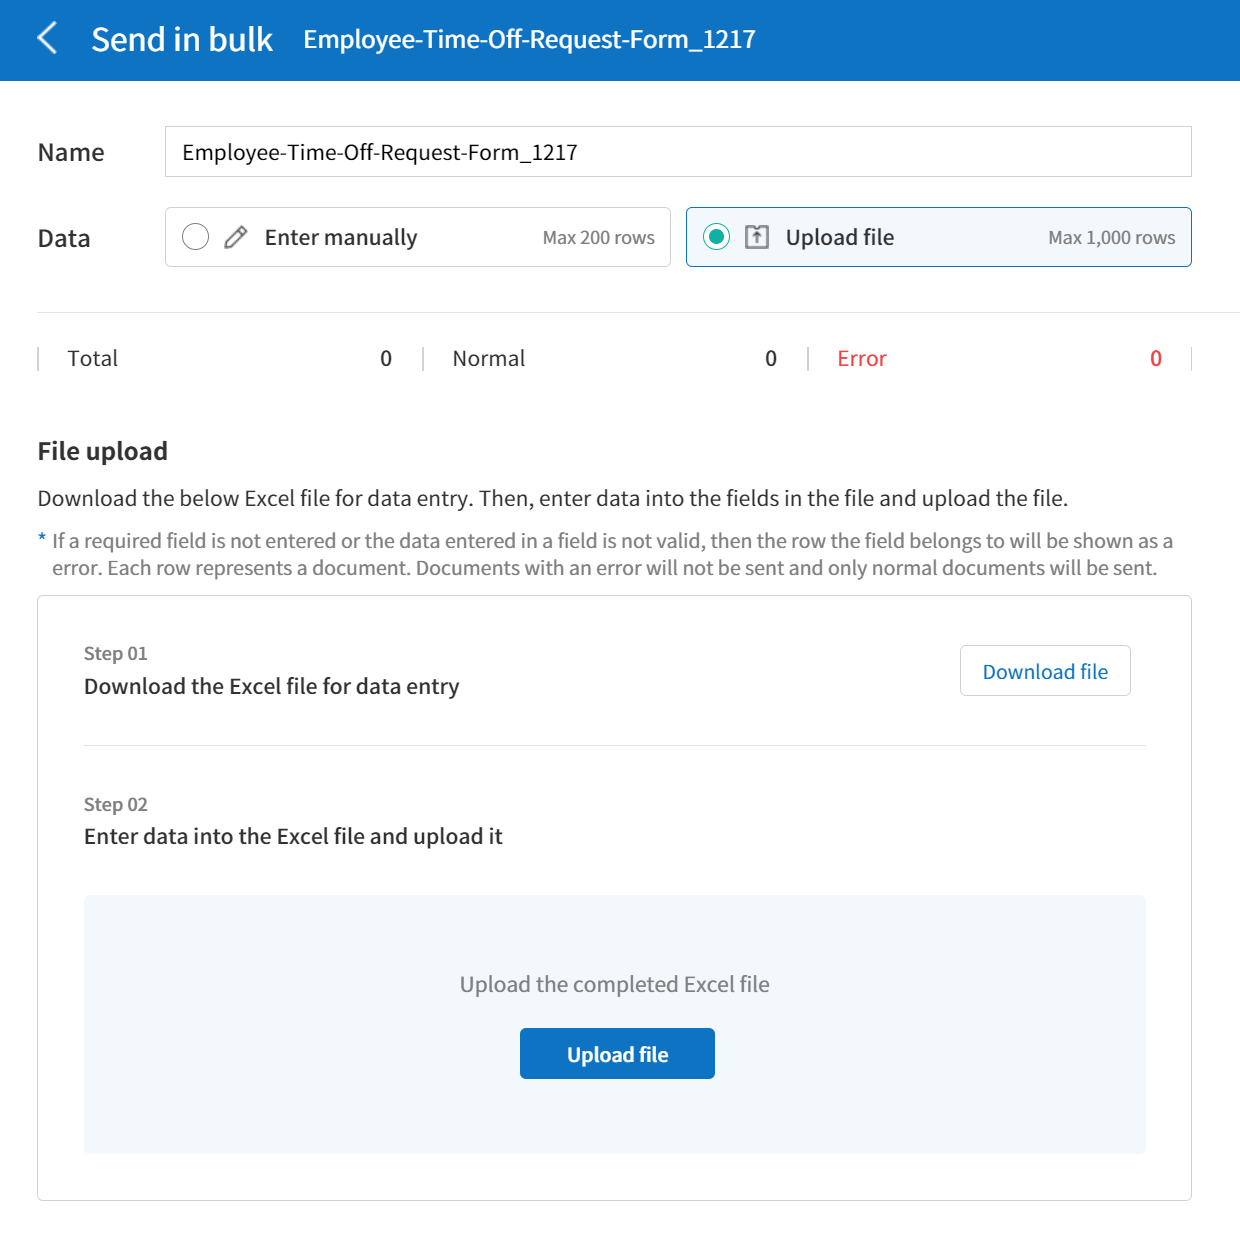
When entering data by uploading an Excel file, you must first download the Excel file for data entry shown on the screen, then enter data into the fields in the file, and then finally upload the file.
Method 2. Upload file: max 1000 documents (rows)
Select Upload file and download the Excel file for data entry. Once the file is downloaded, enter the neccessary data into the file and upload it.
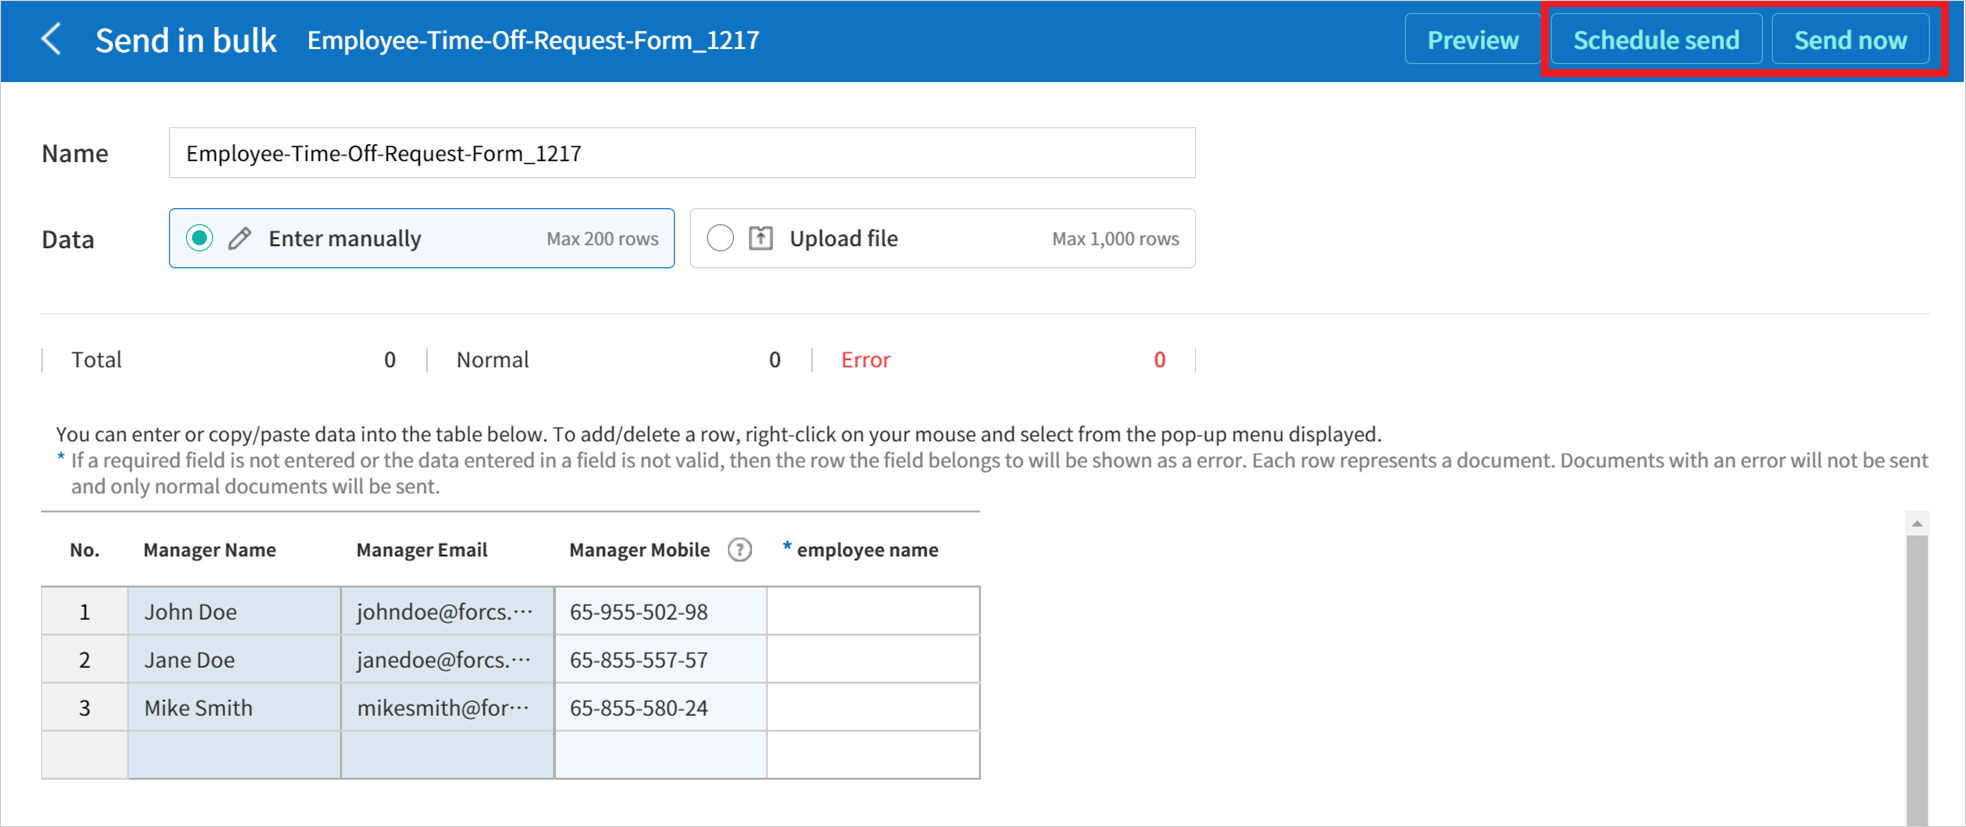
4. Click the Preview button on the top right corner of the screen to
view the documents you created.
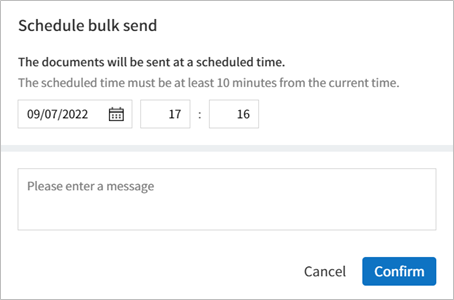
To send the document right away, click the Send now button. To send the documents at a schedule time and date, click the Schedule send button.
Note
In the Schedule bulk send pop-up displayed, select the date and time you want to schedule send the documents. Note that the scheduled time must be at least 10 minutes from the current time.
Go to the Bulk send inbox in the sidebar to view the details of bulk sent documents.
Tip
Right before sending documents in bulk, eformsign will automatically check to see if there are any errors in the document. Documents with an error will not be sent and only normal documents will be sent.
Tip
If there is a field that is not shown in the Send in bulk screen, then the following must be checked.
The fields that cannot be entered in Send in bulk: camera, voice, and grouped radio fields cannot be used in Send in bulk.
2. Check whether the fields are allowed access in Template settings. Only the fields that are checked to be allowed access in Manage templates > Template settings (⚙) > Workflow settings
are shown.
You can delete rows by right-clicking on your mouse and selecting the desired option in the pop-up window.